View all Kitchen Appliances
View all Small Appliances
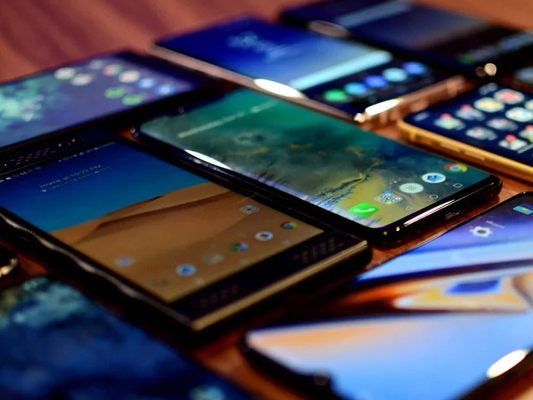
View all MobileAccessories

And it's finally out in the market. All that you want to know about the latest Xiaomi's Redmi 9 Power Android 10 smartphone is here.
Redmi 9 Power: Buyer's Guide
Smartphone manufacturer Xiaomi is all set to expand its product line and has confirmed the launch of Redmi 9 Power. Starting at a price range from Rs 10,999 for the base variant with 4GB RAM and 64GB storage, the Redmi 9 power launch date in India is on December 22, 2020. The android smartphone to be available in all major e-commerce and smartphone stores across India.
Redmi 9 Power's release was announced right after the launch of Xiaomi's fifth android smartphone, Redmi note 9. So what is new in the latest Redmi 9 Power? What are the distinctive Redmi 9 power features? Read along with this blog and make your own smart choice.
Redmi 9 power vs. Redmi note 9
Redmi 9 power is an upgraded version of Redmi note 9. With superpower 18 W fast charger, 6000 mAh battery capacity, protective Gorilla glass, higher resolution, fast Qualcomm Snapdragon 720G processor, expandable storage plus 48MP rear and 16 MP front camera, the android 10 Redmi 9 power smartphone is a win-win compact and versatile choice of a budget and brand-conscious buyer.
Here's a quick look at each of the features in detail.
Redmi 9 Power Features
Redmi introduces a power-packed smartphone experience with their new android 10 addition, the Redmi 9 Power. Featuring a high-resolution Full HD+ display of 1080x2400 pixels for detailed and sharp image quality with a 6.53-inch wide screen size, the android phone offers the best movie-watching experience.
Redmi 9 Power: Design

Redmi redesigns its classic look to give you a refreshing, consistently stylish look. The phone has a unibody curved back with its brand name emblazoned, giving an ultra-modern and smart appearance. The vertical camera setup with anti-fingerprint texture and side-mounted fingerprint sensor provides a comfortable hand feel and grip. Adding to this is the protective splash-proof nano-coating and Gorilla Glass 3 layer that saves you against regular wear and tear. Now, don't have to worry about dropping your phone by mistake.
Redmi 9 Power: Battery and Performance
With the 6000 mAh massive battery capacity and Ultra Battery Saver Mode, you don't have to worry about battery runout. The Redmi 9 power offers you a 695hrs standby battery power, so you don't have to be worried and look for charging points while traveling or otherwise. In the box, you find a 22.5W Fast Charger with an 18W fast charging speed. Be ensured of an enhanced battery lifespan guaranteed with up to 3 years of optimized battery performance. The Redmi 9 Power, powered by the Qualcomm Snapdragon 662 processor with an octa-core CPU and Adreno 610 GPU, offers you a powerful and all-round performance. Now play games, read, study, call, and watch movies for a long time without any worries. Get more details at buy Realme smartphone online
Redmi 9 Power: Stereo Speakers
Redmi 9 Power is installed with stereo speakers to enhance your viewing experience with superior sound during music listening, movie watching, gaming, and video calling. Enjoy the acoustics and plug in your headphones to treat yourself with an undisturbed and high-resolution audio quality.
Redmi 9 Power: Smart Camera
For all the camera lovers, experience the powerful 48MP rear primary camera in a quad-camera array. With the 8MP ultra-wide 120° angle lens, 2MP macro lens, and 2MP depth sensor, capture every moment and every frame with added depth, details, and field of view. With the 8MP Redmi 9 power front camera click stunning selfies. In addition to this, the Redmi 9 power front camera ensures easy accessibility with AI face unlock.
Redmi 9 Power: Competitive Price
The new Redmi 9 Power is available in four contrasting colors; Mighty Black, Blazing Blue, Fiery Red, and Electric Green. Starting at Rs. 10,999, the lowest to date, the phone comes with expandable storage up to 512 GB, the best phone for the price available. Depending on your usage, you can choose amongst the 2 variants, 64 GB and 128 GB UFS storage with 4GB RAM.
Wondering where to buy your Redmi 9 power smartphone?
Get hands-on on the first copy of the new Redmi 9 Power available in different colors only from your No1mobile phone shop, myG Digital.

In 2021, we are going to see an explosion of 5G Phones in the market, with the high demand for data communication, gaming and entertainment. Mobile manufacturers have to race to meet the need for speed. Mobile phone users are ready to take the plunge into 5G phones because, why not! Let’s talk about the Upcoming 5G Phones in Indian market that you are going to absolutely love.
>span cache="font-family: -apple-system, BlinkMacSystemFont, "San Francisco", Roboto, "Segoe UI", Ubuntu, "Helvetica Neue", sans-serif;" data-redactor-span="true" data-redactor-style-cache="font-family: -apple-system, BlinkMacSystemFont, "San Francisco", Roboto, "Segoe UI", Ubuntu, "Helvetica Neue", sans-serif;"
>span cache="font-family: -apple-system, BlinkMacSystemFont, "San Francisco", Roboto, "Segoe UI", Ubuntu, "Helvetica Neue", sans-serif;">So, are you ready to have a glimpse of the best upcoming 5G phones? We have curated a list for you to consider!
Upcoming 5G Phones in India 2021
Some of the best names in the industry have come up with some attractive specifications which are worth exploring. Let’s lunge into a shortlist of the upcoming 5G Phones right away.
Apple iPhone 12
Although launched in 2020, the list would not be complete without mentioning this stunner. Apple iPhone 12 comes with a hexa core processor and 4GB RAM. The camera is exquisite and the OLED display quite commendable. A high-performance smartphone for fluid gaming and multitasking, this upgrade is a remarkable gadget to invest in if you are looking for a 5G-supporting phone. This iPhone comes with 64GB internal storage, albeit non-expandable.
Mi Upcoming 5G Phones
Xiaomi Mi and Redmi phones are highly popular in India with frequent upgrades and fresh models every now and then. Not to mention their durable built quality, nearly 5000 mAh fast-charging battery, Octa-core processors and flexible expandable memory. They have also made it to the top upcoming 5G phones this year. Set to release in February 2021 are models like:
- Xiaomi Redmi Note series (9 Pro 5G, 10 Pro, 9 5G)
- Xiaomi Mi 10i
>span cache="font-family: -apple-system, BlinkMacSystemFont, "San Francisco", Roboto, "Segoe UI", Ubuntu, "Helvetica Neue", sans-serif;" data-redactor-span="true" data-redactor-style-cache="font-family: -apple-system, BlinkMacSystemFont, "San Francisco", Roboto, "Segoe UI", Ubuntu, "Helvetica Neue", sans-serif;">span cache="font-family: -apple-system, BlinkMacSystemFont, "San Francisco", Roboto, "Segoe UI", Ubuntu, "Helvetica Neue", sans-serif;">Samsung Upcoming 5G Phones

Samsung is one of the first brands that you will be expecting to see when you look for upcoming 5G phones in India. Sure enough, they haven’t backed off the race. Samsung Galaxy series has queued up quite some delightful models at various price ranges from as low as Rs 24, 000 to as high as Rs 1,08, 000.
span cache="color: rgb(31, 73, 125);" data-redactor-span="true" data-redactor-style-cache="font-family: -apple-system, BlinkMacSystemFont, "San Francisco", Roboto, "Segoe UI", Ubuntu, "Helvetica Neue", sans-serif;"span cache="color: rgb(31, 73, 125);"> Buy Samsung phone online
Oppo Upcoming 5G Phones
Oppo phones have been a favourite among shutterbugs. Now, in 2021, they are all set to launch 5G phones that quite cut the deal with high spec scores. Stay tuned for the following models from Oppo among the best 5G phones to launch in 2021:
- OPPO Reno series (5, 5 Pro 5G, 5 Pro Plus, Ace 2, 4F, 3 5G, 4, 4 SE, 5 Lite)
- OPPO K7x 5G
- OPPO A53 5G
- OPPO K7
- OPPO A72 5G
- OPPO Find series (X2 Pro, X2 Lite)
- OPPO A92s
Prices range between Rs. 14, 000 - 75, 000 with Octa-core processors and expandable memory. Also, check: Buy Oppo mobiles
Huawei Upcoming 5G Phones
If you are a fan of the durability and smoothness of good old Huawei phones, they are not going to let you down this time either. They have about 20 models of upcoming 5G phones ranging between Rs. 18, 000-2,00,000. Browse through the specifications of the following phones:
- High end: Huawei Mate series (40 Pro Plus, X, 40 Pro, 30 Pro etc)
- Mid-range: Huawei Nova series (8 Pro, 7, 7 SE, 7 Pro, 8, 8 SE etc), Huawei P40 Pro Plus, Huawei Enjoy series (20 Plus, 20, Z etc)
OnePlus Upcoming 5G Phones
>span cache="color: rgb(79, 129, 189);" data-redactor-span="true" data-redactor-style-cache="font-family: -apple-system, BlinkMacSystemFont, "San Francisco", Roboto, "Segoe UI", Ubuntu, "Helvetica Neue", sans-serif;" >span cache="color: rgb(79, 129, 189);">Buy Oneplus mobile online
Motorola Upcoming 5G Phones
Motorola is expected to launch three 5G phones in India in 2021 priced between Rs. 29, 000-50, 000. Motorola lovers here can lookout for the following models:
- Motorola Edge
- Motorola One 2020
- Motorola One 5G Ace
We hope we have given you the best possible recommendations for Upcoming 5G phones in India in 2021.
Now, why not head over to our store and check out which of these stunners are already launched? Or just pre-book your favourite upcoming 5G phone at attractive launch prices to get your hands on it as soon as it’s in the market?
Still, confused about choosing one? Ring us for more updates on the latest in the market!
>span cache="font-family: -apple-system, BlinkMacSystemFont, "San Francisco", Roboto, "Segoe UI", Ubuntu, "Helvetica Neue", sans-serif;">Samsung Upcoming 5G Phones
Samsung is one of the first brands that you will be expecting to see when you look for upcoming 5G phones in India. Sure enough, they haven’t backed off the race. Samsung Galaxy series has queued up quite some delightful models at various price ranges from as low as Rs 24, 000 to as high as Rs 1,08, 000.
span cache="color: rgb(31, 73, 125);" data-redactor-span="true" data-redactor-style-cache="font-family: -apple-system, BlinkMacSystemFont, "San Francisco", Roboto, "Segoe UI", Ubuntu, "Helvetica Neue", sans-serif;"
Oppo Upcoming 5G Phones
Oppo phones have been a favourite among shutterbugs. Now, in 2021, they are all set to launch 5G phones that quite cut the deal with high spec scores. Stay tuned for the following models from Oppo among the best 5G phones to launch in 2021:
- OPPO Reno series (5, 5 Pro 5G, 5 Pro Plus, Ace 2, 4F, 3 5G, 4, 4 SE, 5 Lite)
- OPPO K7x 5G
- OPPO A53 5G
- OPPO K7
- OPPO A72 5G
- OPPO Find series (X2 Pro, X2 Lite)
- OPPO A92s
Prices range between Rs. 14, 000 - 75, 000 with Octa-core processors and expandable memory. Also, check: Buy Oppo mobiles
Huawei Upcoming 5G Phones
If you are a fan of the durability and smoothness of good old Huawei phones, they are not going to let you down this time either. They have about 20 models of upcoming 5G phones ranging between Rs. 18, 000-2,00,000. Browse through the specifications of the following phones:
- High end: Huawei Mate series (40 Pro Plus, X, 40 Pro, 30 Pro etc)
- Mid-range: Huawei Nova series (8 Pro, 7, 7 SE, 7 Pro, 8, 8 SE etc), Huawei P40 Pro Plus, Huawei Enjoy series (20 Plus, 20, Z etc)
OnePlus Upcoming 5G Phones
>span cache="color: rgb(79, 129, 189);" data-redactor-span="true" data-redactor-style-cache="font-family: -apple-system, BlinkMacSystemFont, "San Francisco", Roboto, "Segoe UI", Ubuntu, "Helvetica Neue", sans-serif;"
Motorola Upcoming 5G Phones
Motorola is expected to launch three 5G phones in India in 2021 priced between Rs. 29, 000-50, 000. Motorola lovers here can lookout for the following models:
- Motorola Edge
- Motorola One 2020
- Motorola One 5G Ace
We hope we have given you the best possible recommendations for Upcoming 5G phones in India in 2021.
Now, why not head over to our store and check out which of these stunners are already launched? Or just pre-book your favourite upcoming 5G phone at attractive launch prices to get your hands on it as soon as it’s in the market?
Still, confused about choosing one? Ring us for more updates on the latest in the market!

Imagine your day without your phone? It looks tough, isn't it? Today, as the world moves along, human lives are tied with technology for our everyday life needs. With the dependency of human life on mobile phones, there is always a fear of the batteries going out. To resolve this issue, power banks have been introduced to shelf the life of batteries for long hours.
So, how to choose a power bank for your phone? Which is the best power bank in India? Which power bank should I buy for my phone? What are all the power bank features I must look for? These are the common doubts and questions that may arise in your mind when you are planning to buy a power bank online for yourself.
Take a look at this detailed power bank buying guide that would answer your question on "How to choose a power bank for your phone?" Read along to learn everything about power bank features and benefits. Know which is the most popular choice and the best power bank in India.
Power Bank Buying Guide
Power Banks are external portable battery devices that come in handy when your phone runs out of charge. Life seems unimaginable without the internet and mobile phones. Not only do they help us reach out to friends for help, for a lot of people, mobile phones are a source of income or a tab on the information. There are many times when phones proved to be the best lifelines when you are lost or have trouble finding out the routes. Thanks to the internet and google maps!
Mobile phones today have been replacing desktops and laptops. The number of mobile users is more and has been growing more. Today, for anything that we plan to do or go, the first thing we do is to research on our mobile phone.
It is not an unknown factor that phones with larger screens need more power. Adding to this, our tendency to check phones now and then drains the battery faster. Depending on the capacity of the power banks, you can charge your phone multiple times. You can even use a power bank to charge your tablet. However, other than capacity, there are many different power bank features that you may consider while buying.
How to Choose a Power Bank for your Phone?
With so many brands and types of power banks available in the market, you must be aware of "how to choose a power bank for your phone." We have curated a list of power bank features and benefits for you that will help you quickly decide which kind of power bank is best for you.
Brand or manufacturer matters for quality and safety measures. The good thing about branded products is that they sell you products that adhere to the standard quality check. You can be assured of the long life and the safety of the product.
Depending on your usage, choose power banks with good battery capacity, input, and output power.
Make sure your power bank comes with multiple Connectivity Options and USB Ports. We are sure you do not want to limit your options and single-use your power bank for one device alone.
Reviews, the first key point to look over price. A cheap buy might not give you a long life. At the same time, overpriced or costly products do not mean that they are the best choice. This is where reviews matter. Do a little research on what people have to say about the product, compare, and always go for products from well-known brands, especially when it comes to buying electronics.
Online platforms have made shopping easy. You can easily compare, read reviews, buy, and also return if not satisfied. However, when you are planning to buy electronics online, it is vital that you buy from a platform that has been in the business for quite a time. MyG Digital brand has been solely selling electronic gadgets since 2006 and is one of the trusted and No.1 mobile phone shop in Kerala.
Still not sure how to choose a power bank for your phone?
Visit or contact us at myG Digital, and our team will guide you on how to choose a power bank for your phone.

Most of us wait for festival seasons as they are commonly considered to be the best time to buy TV and other electronics. While festival seasons do come up with offers and discounts that are irresistible, that’s not the only time you can invest in that dream TV you wanted in your living room.
The idea is to follow a few tips to choose wisely and smartly when it comes to buying the best smart TV. The market is exploding with newer designs with better specifications and higher performance every other week. It's naturally a confusing errand to buy a smart TV when you have too many options out there.
Moreover, buying a smart TV is a little more complicated than buying a mobile phone or other electronic gadgets. Read on for a concise Smart TV buying guide for your perusal.
A Smart TV Buying Guide
Gone are the days of the space-occupying block of the traditional old TV. Smart TV is the new kid on the block owing to its versatility and modern specifications. With everyone using smart phones and going smart with all kinds of gadgets, it’s only sensible to buy the best smart TV for one’s home.
Not to mention how the pandemic and lockdown has made smart TV the most sought after entertainment, considering that even movies were being premiered on platforms like Netflix, Amazon Prime and Hotstar. Spending days on end indoors, many of us took to bringing on series and TV shows than we ever have.
Although life is beginning to normalize, the best time to buy TV is still not past you because you are still going to want to chill on weekends and watch movies without masks. So here’s what you should know about choosing the best smart TV.
Know your Specification Requirements
A TV is something that you are going to keep and use for a longer time than a smartphone or tablet. You need to be very picky when it comes to buying a smart TV.
So, know what you need before you think about the best time to buy TV. Research and ask around to those who are knowledgeable about TV specifications. You need to consider the space in your house where you will install your TV and choose specifications like screen size, display type, connectivity and sound accordingly.
Know your Options
>span cache="font-family: -apple-system, BlinkMacSystemFont, "San Francisco", Roboto, "Segoe UI", Ubuntu, "Helvetica Neue", sans-serif; text-align: justify;" data-redactor-span="true" data-redactor-style-cache="font-family: -apple-system, BlinkMacSystemFont, "San Francisco", Roboto, "Segoe UI", Ubuntu, "Helvetica Neue", sans-serif;"
>span cache="font-family: -apple-system, BlinkMacSystemFont, "San Francisco", Roboto, "Segoe UI", Ubuntu, "Helvetica Neue", sans-serif; text-align: justify;">Browse for a practical LED smart TV buying guide to know what to look for when you are choosing one for your home. There are different kinds of LED smart TV sets now to choose from. The most popular in today’s market is LCD LED sets.
There are also over-the-top options like OLED TV sets which offer higher contrast and supremely fine display. If you are not under budget constraints, OLED TVs are quite flamboyant.
Now, if a smart TV is what your mind is set on, we totally get you, because that’s been pretty much the need of the past year and the scenario has not changed a lot. With built-in WiFi and various Operating Systems powering these TVs, just choose the interface that suits your deftness and convenience and you are good to go. Smart TVs are also your best friend when it comes to streaming Netflix, Amazon Prime Videos or even live programs.
Know your Budget

>span cache="color: rgb(79, 129, 189);" data-redactor-span="true" data-redactor-style-cache="text-align: justify; font-family: -apple-system, BlinkMacSystemFont, "San Francisco", Roboto, "Segoe UI", Ubuntu, "Helvetica Neue", sans-serif;"
If you are on a budget, which many have been in the past year, the best time to buy TV is during special sales days, especially online stores. Even high-end products come with considerable discounts and attractive offers during festival seasons like Onam, Diwali, Christmas and New Year. Keep your eyes open for promotional sales, too, from newly opened retailers and distributors as they can be really worth it. Also, check: Offers on TV
What are your preferences and requirements when investing in a TV? If this short attempt at a guide to buying a smart TV has answered your important queries, check out our online store for a myriad collection of TVs and other electronics.
If you have got more questions for us, reach out to us. We would love to help you choose that fine companion you need at home after a taxing day!

A tablet is an ultimate solution for your on-the-go entertainment and work needs. And as you might know, a wide range of tablets are currently available from different brands with various features. The question is which one suits your needs. With an array of products available, selecting one can get a bit difficult. Through this guide, we aim to tackle your confusions that arise when you are buying a tablet by emphasizing various factors. Let's dive in!
Tablet Price
Tablets come equipped with a range of features and are priced accordingly. But for you to know which one fills your requirements, you need to decide the amount of money you are ready to spend. Once you fix your budget, the task of buying a suitable tablet is half done. By determining the price, you could prepare a specific list comprising products that fall under your budget. This is arguably the first step when it comes to buying any gadget.
Display Size
Based on the purpose it serves, the display of the tablet of your choice may be smaller or larger. If you want your tablet to be highly portable and to perform basic tasks like reading, browsing, or social media, a smaller display would be sufficient. Moreover, smaller tablets can fit in easily. On the other hand, you would require a larger display if movies, games, and multitasking are your thing.
Screen Resolution
Processor
>span cache="font-family: -apple-system, BlinkMacSystemFont, "San Francisco", Roboto, "Segoe UI", Ubuntu, "Helvetica Neue", sans-serif;"
Operating Systems
>span cache="font-family: -apple-system, BlinkMacSystemFont, "San Francisco", Roboto, "Segoe UI", Ubuntu, "Helvetica Neue", sans-serif;" data-redactor-span="true" data-redactor-style-cache="font-family: -apple-system, BlinkMacSystemFont, "San Francisco", Roboto, "Segoe UI", Ubuntu, "Helvetica Neue", sans-serif;"
Processor
>span cache="font-family: -apple-system, BlinkMacSystemFont, "San Francisco", Roboto, "Segoe UI", Ubuntu, "Helvetica Neue", sans-serif;"
Operating Systems
>span cache="font-family: -apple-system, BlinkMacSystemFont, "San Francisco", Roboto, "Segoe UI", Ubuntu, "Helvetica Neue", sans-serif;">Android and iOS are widely used operating systems in tablets. As with Android, it is highly adaptable due to its open-source nature and flexibility. And so it is commonly used and offers you a wide array of applications, be it for productivity or gaming. Thus, Android is an option for people from all aspects. When considering iOS, it is used only in Apple's iPads apart from its iPhones. Though iOS is not as open-sourced as Android, it comes equipped with malware protection and security features. If you are already an Apple user, choosing an iPad might be more compatible.
RAM
A super-fast processor without sufficient RAM may not be efficient. So for a smoother user interface, a higher RAM is recommended. If you are a professional preferring improved productivity or high-end gaming, pick a tablet that boasts a higher ram like 6GB or more. Tablets with lower RAMs are much cheaper but cannot run high-end programs. As long as you do not want your tablet to carry on hefty operations, a lower RAM with 2GB or 4GB capacity might be all you need.
Internal Storage
To avoid future regrets, it is better you select a tablet with sufficient storage, especially if you are buying an Apple iPad, as they do not support expandable storage. The only reliable extra storage might be cloud storage. You may not worry much about storage if you are buying an Android-powered tablet as most of them support expandable storage. Either way, spending some extra money for extra storage might be of great use to store photo and video contents as well as to install hefty applications.
Battery
Connectivity
>span cache="font-family: -apple-system, BlinkMacSystemFont, "San Francisco", Roboto, "Segoe UI", Ubuntu, "Helvetica Neue", sans-serif;" data-redactor-span="true" data-redactor-style-cache="font-family: -apple-system, BlinkMacSystemFont, "San Francisco", Roboto, "Segoe UI", Ubuntu, "Helvetica Neue", sans-serif;"
Connectivity
>span cache="font-family: -apple-system, BlinkMacSystemFont, "San Francisco", Roboto, "Segoe UI", Ubuntu, "Helvetica Neue", sans-serif;">Tablets do not come with ports as much as laptops do. However, Android tablets are equipped with a USB, micro USB, or USB-C ports that lets you connect to external peripherals. Further, an HDMI port and a memory card slot are also available in some models. Meanwhile, iPads use a lightning connector to connect peripherals as well as for charging. In terms of wireless connectivity, Wi-Fi and Bluetooth enable wireless data transfers. Moreover, Chromecast lets you access contents from your Android tablets on a bigger screen, while Airplay does the same for iPads.
Camera
Tablets are equipped with both front and rear cameras, but they do not perform like smartphone cameras. The front cameras are mostly used for video conferencing, and so it functions accordingly. The rear cameras may perform well but won't capture that perfect picture a smartphone camera clicks. Though cameras are not a prior feature in tablets, they are good enough for some quick snaps. However, If you are a photography buff or plans to do photography in your tablet, make sure you go for the one with high megapixels
Brand
Today, the competition is stringent with an umpteen number of brands producing a wide range of excellent tablets. Some buyers approach with a pre-equipped mind to go for a specific brand, whereas, some can get confused about which brand to choose and indeed, it can be confusing. Some of the popular brands include Apple, Samsung, Acer, Lenovo, Honor, iBall, etc. which have carved a reputation for producing compelling devices in various price ranges. Therefore, first, make sure the brand is a recognised one like the ones we have mentioned above and shortlist some models that have good features and lastly, select one that meets your requirements.
Warranty
There are a lot of tablet brands out there with a vast number of products. Another factor to be considered before buying a tablet is the warranty it offers. Mostly, brands offer a 1-year warranty and some stores provide extra warranty for a few extra bucks. For instance, myG provides an extended warranty for many gadgets, provided you pay a few thousand additionally. Also, Make sure that your tablet's brand has a good network of authorized service centres with after-sales services. A proper check on this factor will be favourable in case of unexpected damage.
The smartphone industry had significantly surged this year and 2021 is expected to be a year of groundbreaking technologies apart from the development & extensive use of recently-introduced technologies. With all these, the industry is hoping for an exciting year ahead. At this point of time, rumors are floating around about some technologies like enhanced protective glass, new versions of Android, and more. Let's have a look at some of those notable features & technologies that might be available with the smartphones of 2021.
Expected New Features And Improvements:
Under-Display Selfie Camera
In an attempt to maximize the screen-to-body ratio, brands have been placing front cameras in notch displays, in-display punch-holes, and even in rotating and pop-up modules. Now, smartphone manufacturers have turned to under-display front cameras, an innovative move to increase the screen-to-body ratio. Though under-display selfie camera smartphones are already available, they are not good enough to perfectly cover the underlying camera. However, a flawless in-display camera is anticipated in 2021.
Corning Gorilla Glass Victus
The flagship devices of 2021 will be widely equipped with Corning Gorilla Glass Victus, capable of surviving falls from up to 2 meters onto hard and rough surfaces, which is a step higher than its predecessor - Gorilla 6. Besides, Victus has better scratch performance than its predecessors. Adopting Gorilla Glass Victus can provide significant improvement in the durability of smartphones. Moreover, the cameras on the back which are prone to damage as they have become larger and protruding can be secured to a great extent with Victus
Android 12 & iOS 15
Android 11 has already rolled out, but most smartphones are yet awaiting the update. Moreover, it is also expected that Google will be rolling out Android 12 during 2021. However, there is not much information available regarding the next Android update. Still, there are rumors regarding Google making Android Runtime a module in Android 12's Project Mainline that could enable frequent OS updates through Play Store, instead of the less frequent conventional over-the-air updates.
Apple is expected to launch the iOS 15 in 2021 alongside the iPhone 13, enhancing the iOS 14. There are no sufficient details concerning the exact launch date and the expected features. However, leaks indicate that the iOS 15 will only be available for the iPhone 7 and later. We will have to wait to hear from Apple to know more about iOS 15.
Snapdragon 888
The premium smartphones of 2021 might pack the Qualcomm Snapdragon 888 5G, which is supposed to take connectivity, artificial intelligence, camera, gaming, performance, and security to the next level. Furthermore, With the Snapdragon 888, connectivity features like 5G, Wi-Fi, and Bluetooth will be improved, thus providing a futuristic mobile experience. Also, it is capable of transforming smartphones into cameras producing professional quality pictures and videos. This chipset is also capable of boosting performance and gaming experience, along with providing improved power efficiency. Another advantage Snapdragon 888 can provide is advanced security with utmost privacy. Apart from all these, AI leaps forward and blends in with almost every feature to deliver a performance boost.
Faster Wireless Charging
Fast charging has been evolving over the past years, and currently, smartphones supporting up to 120W fast charging are available while wireless fast charging is in the range of 10W to 15W. Moreover, wireless charging is getting approval everywhere. And so, it is obvious that in 2021 wireless fast charging will undergo significant improvements. There are rumors that manufacturers are working to boost wireless fast-charging up to 100W. Anyway, there is a lot more manufacturers have to work on as faster charging reduces battery life over time. Let us keep our fingers crossed.
Foldable Smartphones With Multi-Fold Design
Foldable smartphones are already available in a whopping price tag many can't afford and are bi-folded. But in 2021, multi-folded smartphones may be launched by smartphone manufacturers. A multi-fold design could help multiple the screen sizes according to our requirements. Hence, we can use them as a regular smartphone that is handy or as a tablet for multitasking, gaming, streaming, and so on. However, most multi-fold devices are just a concept or a prototype, and the wear and tear of such devices is still a concern for brands.
Rollable Smartphones
Rollable smartphones are becoming the anticipated alternatives for the existing foldable smartphones, and the first rollable smartphone is expected in 2021. Unlike foldable phones that use a folding display, rollable phones use an extendable display that rolls out to enlarge the screen size. The rollable design significantly reduces the total size of the phone. As a result, switching between the smaller and bigger screens becomes easier.
Back Panels That Change Color
2021 might be the year of colour-changing smartphones, as smartphone makers are introducing phones with back panels that change colour based on electrochromic technology. The colour change occurs with a touch or a wave over the back, and it is speculated that the changing colours may even be used in notifying the users when receiving notifications.
Nearly Bezel-Less And Transparent Smartphones
Brands have been filing patents for years to design a transparent phone. In 2021 a transparent phone may not become a reality, but there are chances we might see one in the near future. Nevertheless, bezel-less smartphones are currently available, and next year we might get an opportunity to witness the launch of almost nil bezel smartphones.
Affordable 5G Smartphones
5G smartphones are already available, but considering the current price tag, it is not affordable for most of them. This might not be the same in 2021 since smartphone manufacturers are already working on affordable 5G phones. Though 5G is not yet available in India, it is anticipated that 5G phones will have a wider reach with availability in every budget.
Conclusion
The smartphone industry is to witness so much during 2021 in terms of innovative technologies capable of providing outperforming slimmer smartphones. Brands are doing big reveals about the launch of their latest products, and it seems 2021 is going to be a promising year. All we have to do now is to wait and watch to find out what is in the making.

Mobile Phones have become an integral part of our day-to-day activities, consequently making mobile phone accessories a necessity. Based on the purpose it serves, there are a variety of mobile phone accessories, providing uninterrupted usage, effortless handling, as well as making the most out of your smartphone. The growth of the smartphone industry over recent years boosted the smartphone accessories market as well. Besides, there are other reasons for the surge in the mobile accessories market. Before getting to know why the mobile accessories market is surging, let us go through some of the mobile accessories we use daily.
Mobile Accessories That Has Become A Requirement
>span cache="color: #0000ff;" data-redactor-span="true" data-redactor-style-cache="font-family: -apple-system, BlinkMacSystemFont, "San Francisco", Roboto, "Segoe UI", Ubuntu, "Helvetica Neue", sans-serif;"
Reasons For The Surge In Mobile Accessories Market
Now that we know the mobile accessories currently available in the market, let's have a look at the reasons causing a surge in the mobile accessories market.
Exponential Growth In Smartphone Sales
One of the major reasons for the surge in the mobile accessories market is without a doubt, the growth in smartphone sales. The rise in smartphone sales is fueled by a decrease in the price and an increase in the availability of smartphones. Besides, the spending capacity of people has improved over time. What's more, high-speed internet connection is accessible from almost every nook and corner of the country, therefore promoting smartphone sales, and of course, mobile accessories. Another notable reason for the upsurge in smartphone sales is the convenience of online shopping, with a bunch of online payment options and even cash on delivery. Above all, smartphones have become a fundamental part of our lives, and so are the accessories.
Increased Preference For Wireless Accessories
Everyone is fond of going wireless with the launch of wireless earphones and wireless chargers. Going wireless has certainly made listening tangle-free, and everyone is eager to get their hands on the latest wireless earphones as soon as they can. The comfort, affordability, and, sound quality, wireless earphones have to offer has made consumers prefer wireless over wired earphones. Besides, wireless charging is going mainstream too, and it eliminates the need for charging cables and travel adapters. A cordless charging experience is what most of them feel convenient to use, and leading smartphone manufacturers are rolling out wireless charging support in their latest devices. As a result, an increase in the sales of wireless chargers is definite as well.
Online And Offline Availability
Online shopping is thriving all over the country, and the products we need are just a click away. Needless to say, almost every mobile accessory brands have made their products available online. Besides, these products are priced considering low, mid, and high budget customers, thus attracting a majority of people. And obviously, online shopping is a driving factor in the growth of the mobile accessories market. Apart from online stores, the rapid establishment of offline stores is also a major factor in the market surge of mobile accessories.
Extensive Distribution Networks
Economical Price Tags
>span cache="font-family: -apple-system, BlinkMacSystemFont, "San Francisco", Roboto, "Segoe UI", Ubuntu, "Helvetica Neue", sans-serif;"
Power Interruptions
>span cache="font-family: -apple-system, BlinkMacSystemFont, "San Francisco", Roboto, "Segoe UI", Ubuntu, "Helvetica Neue", sans-serif;" data-redactor-span="true" data-redactor-style-cache="font-family: -apple-system, BlinkMacSystemFont, "San Francisco", Roboto, "Segoe UI", Ubuntu, "Helvetica Neue", sans-serif;"
Economical Price Tags
>span cache="font-family: -apple-system, BlinkMacSystemFont, "San Francisco", Roboto, "Segoe UI", Ubuntu, "Helvetica Neue", sans-serif;"
Power Interruptions
>span cache="font-family: -apple-system, BlinkMacSystemFont, "San Francisco", Roboto, "Segoe UI", Ubuntu, "Helvetica Neue", sans-serif;">Most of us rely on our smartphones for our day-to-day activities, and we need an uninterrupted service from our devices. But there are chances when our devices drain out while traveling or due to power outages. And this is when power banks, one of the most selling mobile accessories, comes to the rescue. Thus, power interruption is one of the factors that directly or indirectly affects the mobile accessories market.
Advancing Technology
Not so long ago, the only mobile accessories we needed were chargers, data cables, and earphones. Times change, and so does the technologies. Advancing technology resulted in comfortable and flexible accessories along with increased demand for them. Consequently, this affected the mobile accessories market. Now, the list of mobile accessories we carry with us includes wireless earphones, power banks, smartwatches, and so on.
Conclusion
To be precise, the technological development over the past years has been spontaneous, resulting in state-of-the-art devices that are part of our lives. Consequently, mobile accessories too, have become a basic requirement. Moreover, the demand for mobile accessories has increased drastically with its wide availability. As a result, the mobile accessories market is experiencing an upsurge, and it is predicted that the surge may be observed in the years ahead as well.

5G, the planned successor to the widely used 4G networks, is the fifth generation of cellular networks. Low-band 5G is OFDM based, which is a type of digital transmission 4G LTE uses. The air interface for 5G is known as New Radio(NR) and is subdivided into two frequency bands, FR1 and FR2. Mid-band 5G uses Frequency Range 1(FR1) with frequency bands less than 6GHz while high-band 5G uses FR2 with frequencies above 24 GHz mmWave (millimeter waves). 5G is about increased speed and reduced latency, resulting in faster downloads and uploads. But the benefits of 5G is not limited to just high-speed data transfers. The transition to the 5G network from existing networks can change the way we live since it can connect everyone and everything. Here is everything 5G has to offer.
Blazing Downloads and Uploads
5G ensures blazing download speeds with some of the prominent 5G providers claiming a peak speed of 20Gbps. Nevertheless, the data transfer speeds vary between different bands of 5G. Low-band 5G uses the same frequency range of 4G but enhances the download speed a little higher than 4G whereas mid-band 5G gives approximately 1Gbps data speed. Varying from these, high-band 5G provides multi-Gbps speeds with the use of mmWave, which is a short-range, high-frequency network technology. However, an approximated speed of 1Gbps is expected when 5G rolls out, which is many times faster than 4G. Moreover, 5G technology reduces latency to a great extent. Latency is the transmission time for a packet of data. Reduced latency plays a key role in providing faster downloads and uninterrupted streaming of high definition videos.
Seamless Video Calls
Video calls can be made more interactive with 5G networks. With its faster and more reliable network, 5G supports high definition and even three-dimensional video conferencing without any interruptions. To be more precise, it furnishes the users with a crystal-clear video calling experience without lags and connectivity issues. Other important factors that make video calls seamless and interactive are 5G's reduced latency and higher throughput.
Addictive Gaming Experience
Online gaming experience can be taken to the next level with 5G networks. Apart from high-speed data transfer, ultra-fast responsiveness is what makes online gaming awesome. With 5G's low latency, higher bandwidth, and reduced response time, edge computing becomes more feasible. This means the gaming device you use will communicate with smaller data hubs that are closer rather than communicating with a central server over a long distance, thus reducing overall communication time. Edge computing ensures a smooth gaming experience even on low spec phones as long as a 5G connection is available.
Immersive AR & VR
One of the main types of connected services in which 5G can be used is enhanced mobile broadband, which enhances immersive experiences such as virtual reality and augmented reality. The possibilities 5G has to offer could potentially make education, entertainment, and social communication experiences through VR exceptional. Now, coming to AR, 5G enables a whole new prospect for professionals, explorers, families, children, and even fitness enthusiasts thus serving a broad range of roles in daily life. The key features of 5G including low latency, high data speeds, and edge computing helps in creating an interactive and immersive experience through VR & AR.
Affordable 5G Phones
5G is expanding worldwide with some countries enjoying the service already. The transition from 4G to 5G may be faster than the transition from 3G to 4G and mobile phone manufacturers are speeding up the production of 5G compatible mobile phones. The 5G phones being launched now are costly. Affordable 5G phones should be widely available by the time 5G becomes commonly accessible and that could be within a few years.
Always Connected 5G laptops
>span cache="color: #0000ff;" data-redactor-span="true" data-redactor-style-cache="font-family: -apple-system, BlinkMacSystemFont, "San Francisco", Roboto, "Segoe UI", Ubuntu, "Helvetica Neue", sans-serif;"
Massive IoT
Massive IoT is another connected service, 5G is capable of. It helps connect meters, machinery sensors, and consumer electronics. Besides, massive IoT assists in the digitization of transportation, agriculture, manufacturing, and other physical industries. 5G could facilitate IoT to run instantaneous traffic analyses virtually, improve security and public safety. 5G enabled IoT can thus help support a wide range of activities across the world. New applications in the Internet of Things will be made possible with the help of 5G networks. 5G technology will also help connect a large number of IoT devices promoting massive machine-type communication without human interference. Furthermore, the ultra-responsiveness of 5G lends a hand in making home automation easier and smarter.
Enhanced Artificial Intelligence
5G and AI go hand in hand to create groundbreaking technologies. As a result, what was already possible can be done in an instant, like instant language translation. With 5G, AI is made more intelligent, enabling live streaming in Smart TVs more interactive and uninterrupted. Moreover, users could customize the view of the point as per their wish.
People from around the world are excited about the launch of 5G, mostly because of the high data transfer speed it has to offer. But what makes 5G stand out is something more than just fast downloads, like enhanced mobile broadband, mission-critical communications, and massive IoT.
Let's conclude by having a look at some of the anticipated questions.
Can 5G replace wifi?
5G may not replace Wi-Fi soon, but with the technology incorporated in 5G cellular networks, a convergence of Wi-Fi and cellular networks is possible. The gap between Wi-Fi and cellular networks indoor and outdoor can be reduced significantly with the convergence of Wi-Fi and cellular networks. 5G still has the potential to replace existing home internet service providers by providing a wireless modem alternative.
When will 5G be available?
5G started rolling out during mid-2019. As of June 2020, 35+ countries had access to 5G. Compared to 4G, a much faster rollout of 5G is expected. 5G should be commonly available within a few years.
Can 5G make 4G faster?
The early version of 5G services is called 5G non-standalone(NSA), which is a 5G radio technology built on the existing 4G LTE network infrastructure. Initially, 5G services will be rolled out in a way that the consumer can switch to 4G when 5G is not available. Still, it is uncertain whether 5G can make 4G faster. We will have to wait to make sure of it.